Using FishXCode with Codex Desktop
New user? Complete account setup and top-up first, then create a usable token in the FishXCode console.
Scope
This guide covers connecting OpenAI Codex Desktop to FishXCode. For Codex CLI installation and configuration, see Using FishXCode with Codex. Codex Desktop should reuse the same ~/.codex configuration so you do not maintain two separate setups.
Recommended path
Create the local Codex configuration first, then open Codex Desktop and sign in. This keeps the desktop app and CLI on the same FishXCode API base URL, model, and token.
1. Install Codex Desktop
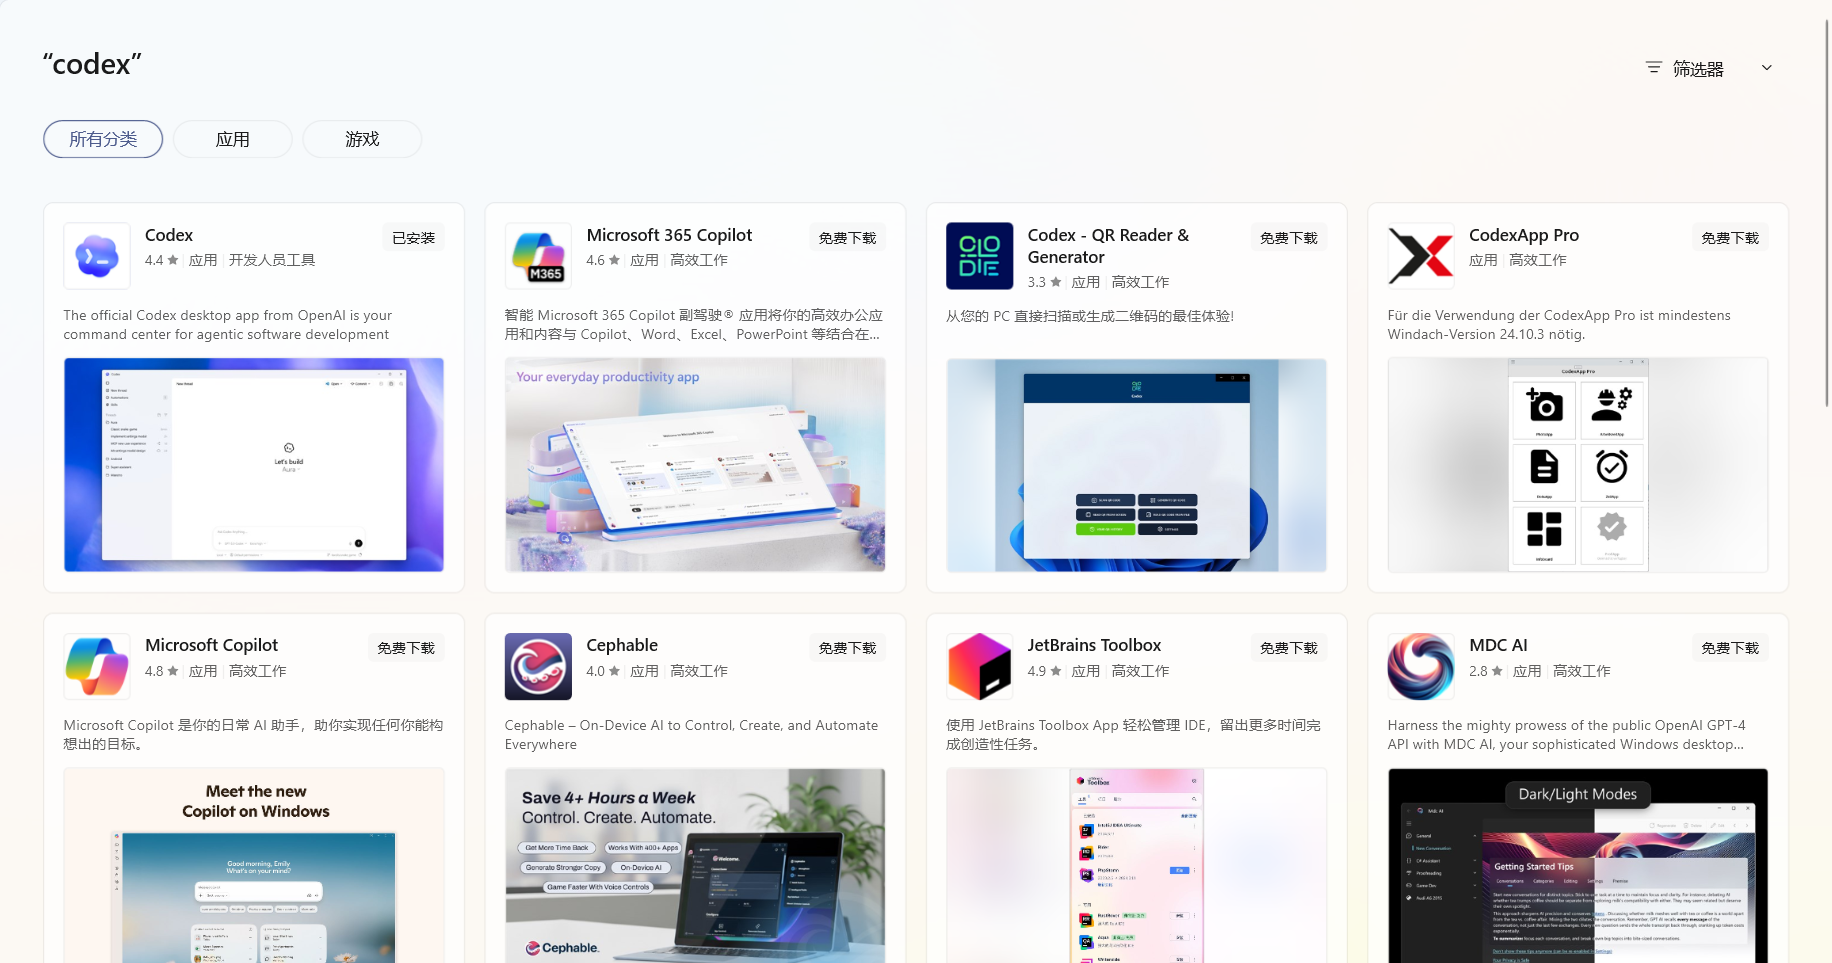
On Windows, open Microsoft Store, search for Codex, and install the official app:
After installation, configure FishXCode before signing in. If Microsoft Store is unavailable, use an official OpenAI release channel or another trusted software distribution channel.
2. Reuse the Codex Configuration for FishXCode
Codex Desktop and Codex CLI should use the same user configuration. The configuration below matches the Codex CLI guide.
1. Create the config directory
mkdir -p ~/.codexNew-Item -ItemType Directory -Force "$env:USERPROFILE\.codex"2. Write config.toml
Create ~/.codex/config.toml with:
model_provider = "fishxcode"
model = "gpt-5.4"
review_model = "gpt-5.4"
model_reasoning_effort = "medium"
model_reasoning_summary = "detailed"
disable_response_storage = true
preferred_auth_method = "apikey"
model_verbosity = "high"

[model_providers.fishxcode]
name = "OpenAI using Chat Completions"
base_url = "https://api.fishxcode.com/v1"
wire_api = "responses"
requires_openai_auth = true

[features]
skills = true
image_generation = false
INFO
You can change model and review_model to another model available in your plan or group. If unsure, start with gpt-5.4.
3. Write auth.json
Create ~/.codex/auth.json with your FishXCode token:
{
  "OPENAI_API_KEY": "your_api_key_here"
}
WARNING
auth.json contains your secret token. Do not commit it to Git or share it.
3. Sign In to Codex Desktop
Open Codex Desktop. If the sign-in screen appears, choose Use another sign-in method:
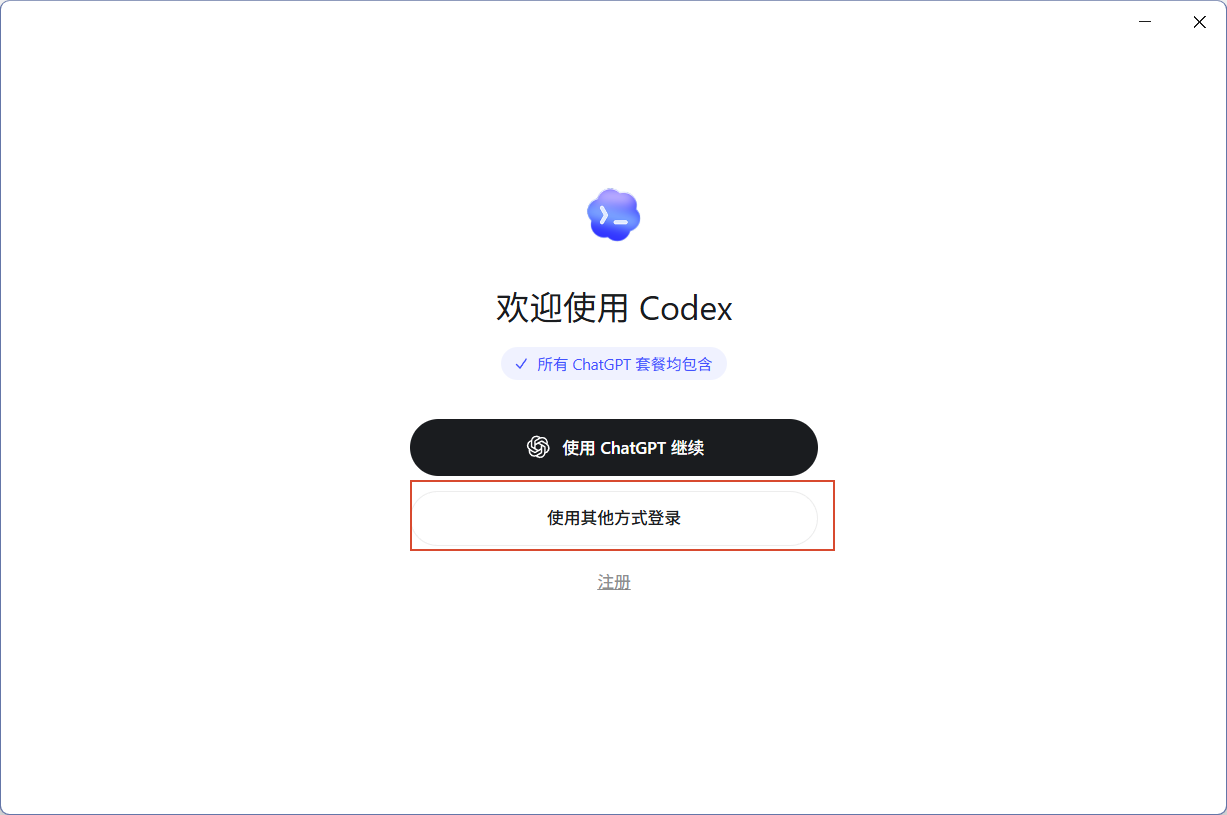
Paste the token copied from the FishXCode console. If you already wrote ~/.codex/auth.json but still see a sign-in prompt, paste the same token here.
To copy a token, find it on the FishXCode token page and use the copy button next to the key. This guide does not show the copy menu in screenshots to avoid exposing unnecessary key details.
After signing in, choose the project folder you want Codex to work on.
4. Optional: Manage Channels with CC Switch
Use CC Switch if you maintain multiple Codex channels. If FishXCode is your only channel, a single ~/.codex/config.toml is usually enough.
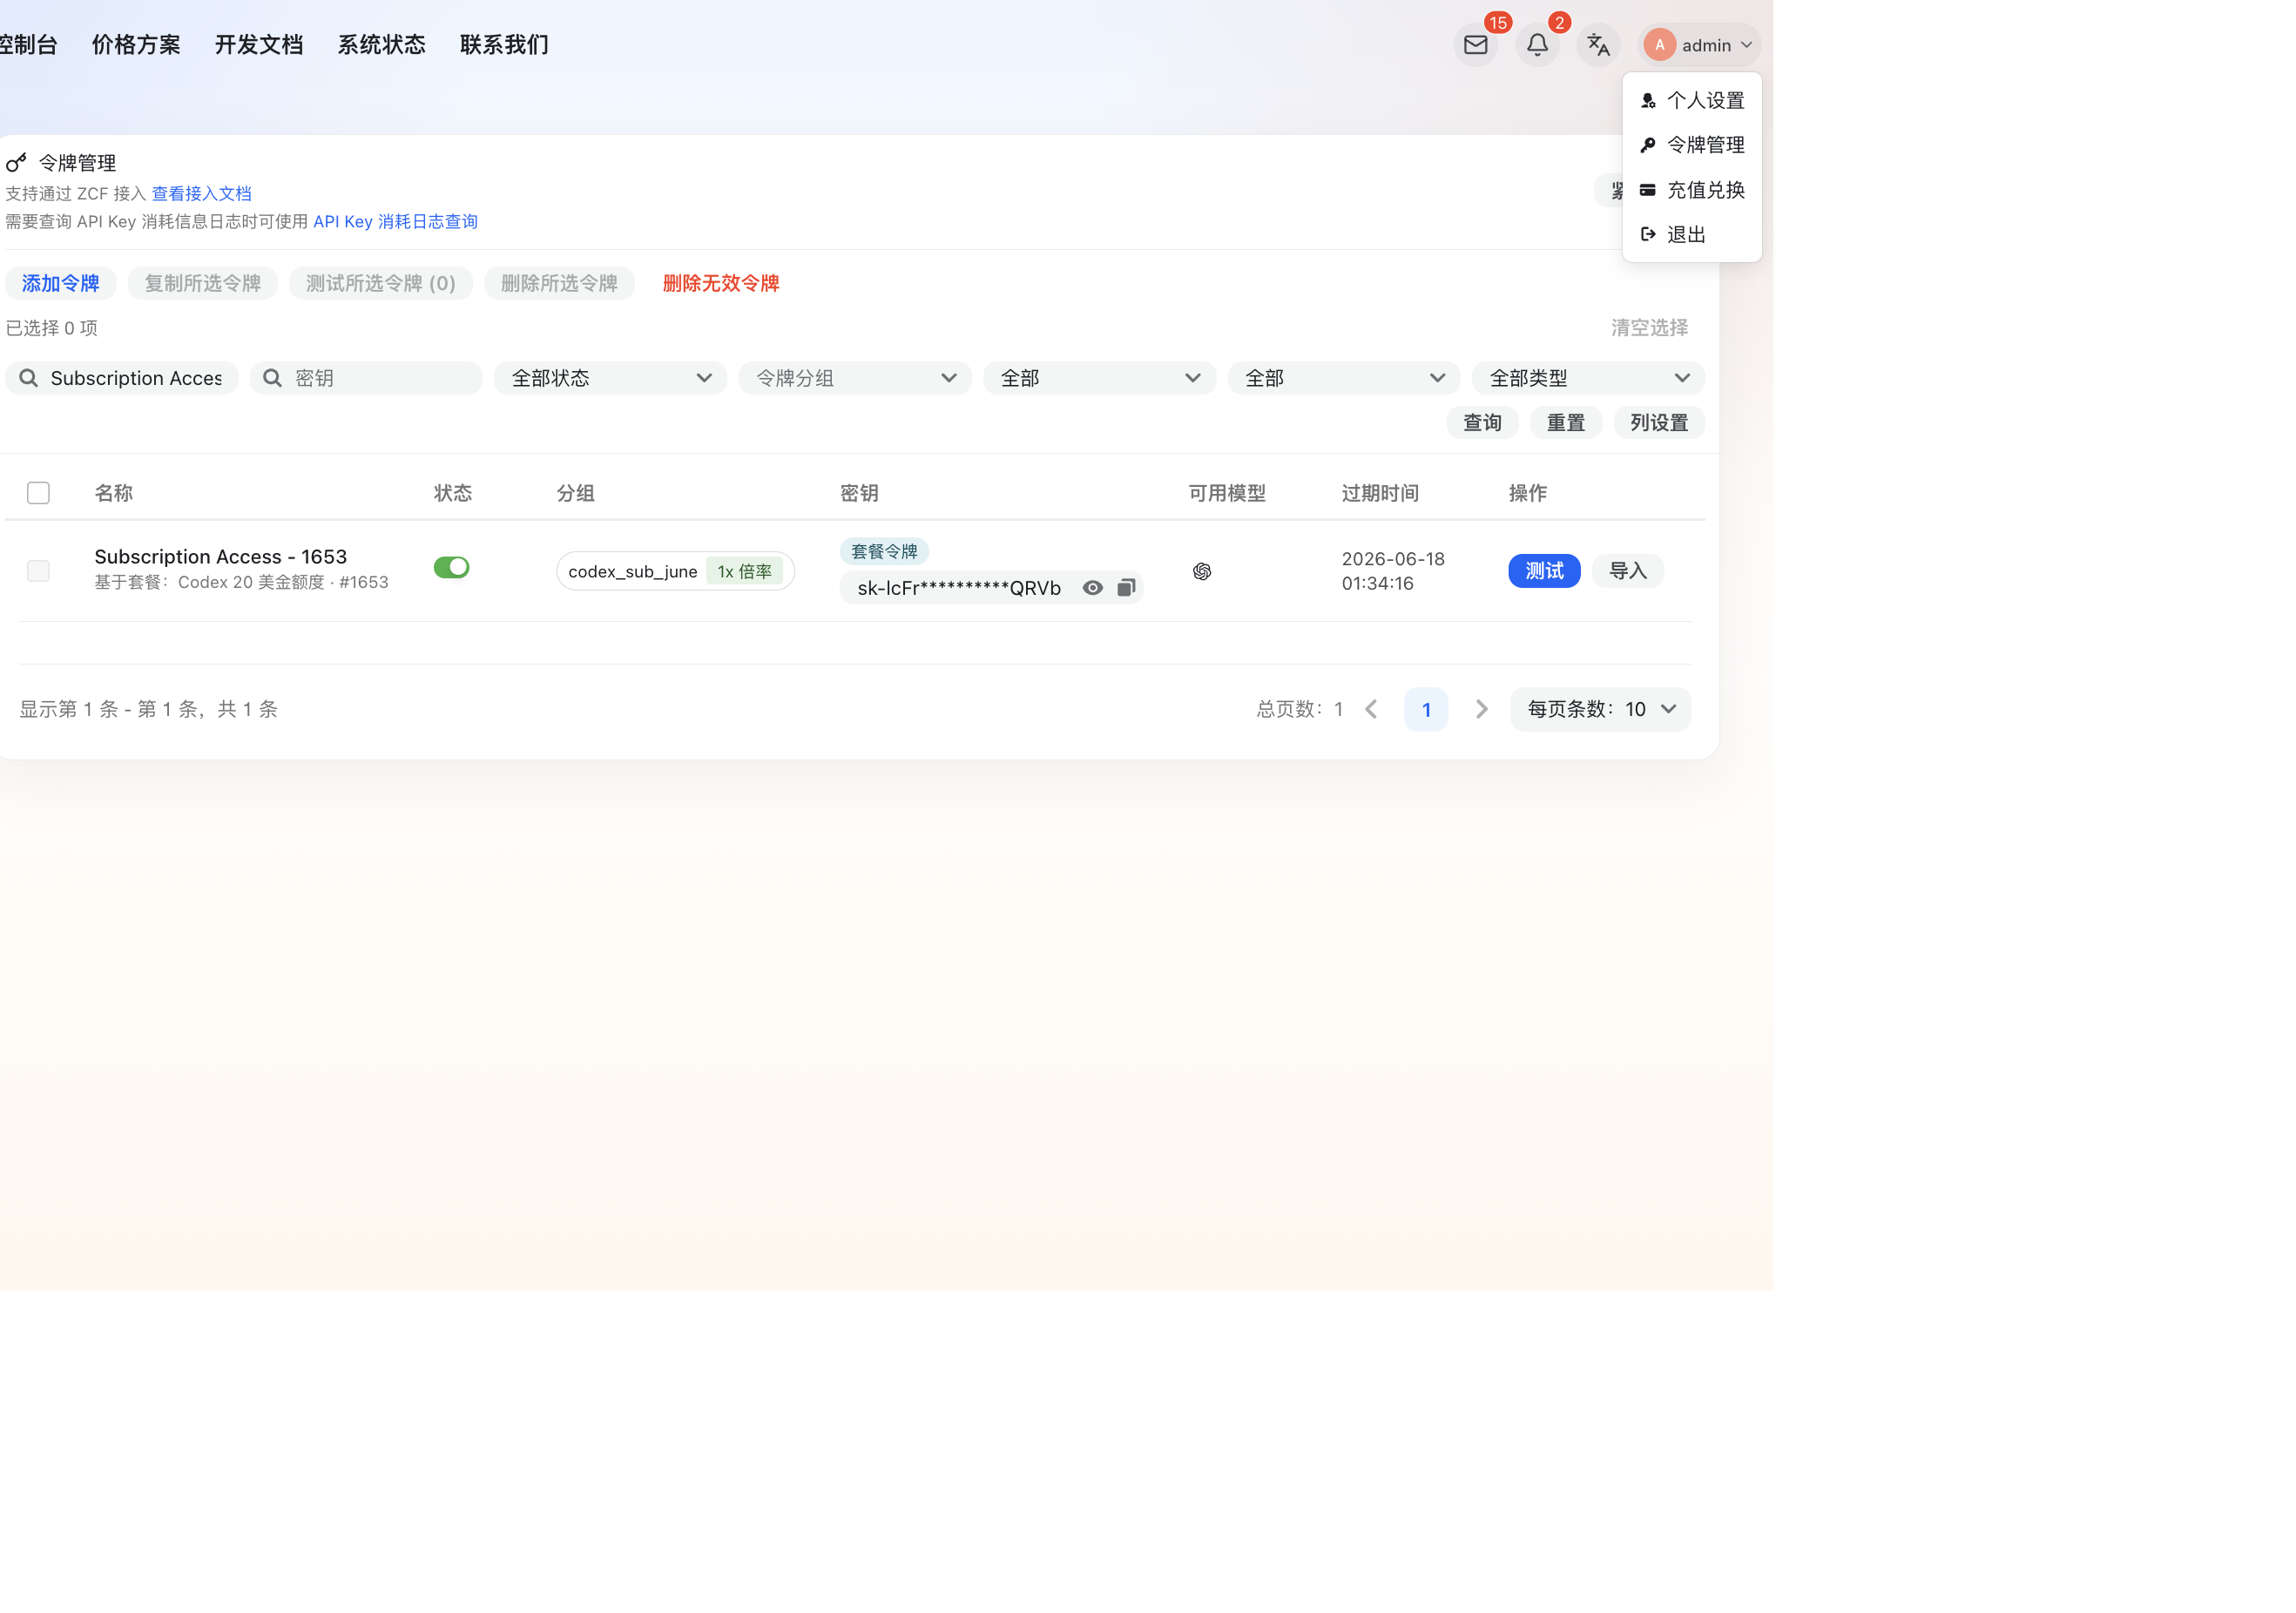
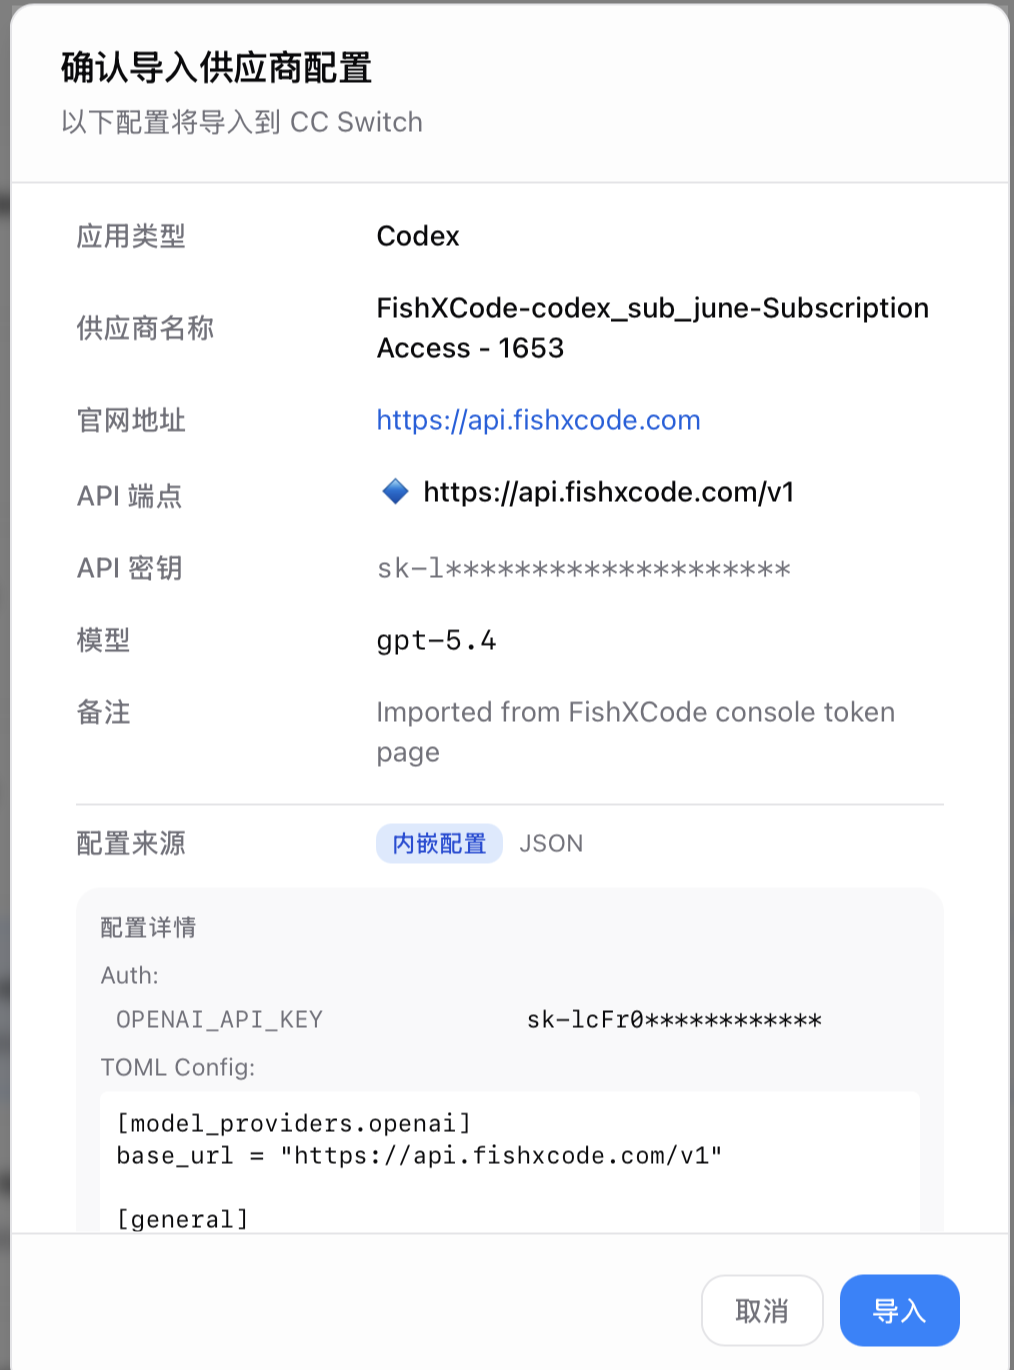
On the FishXCode token page, find the target token and click Import on the codex_sub_june group row:
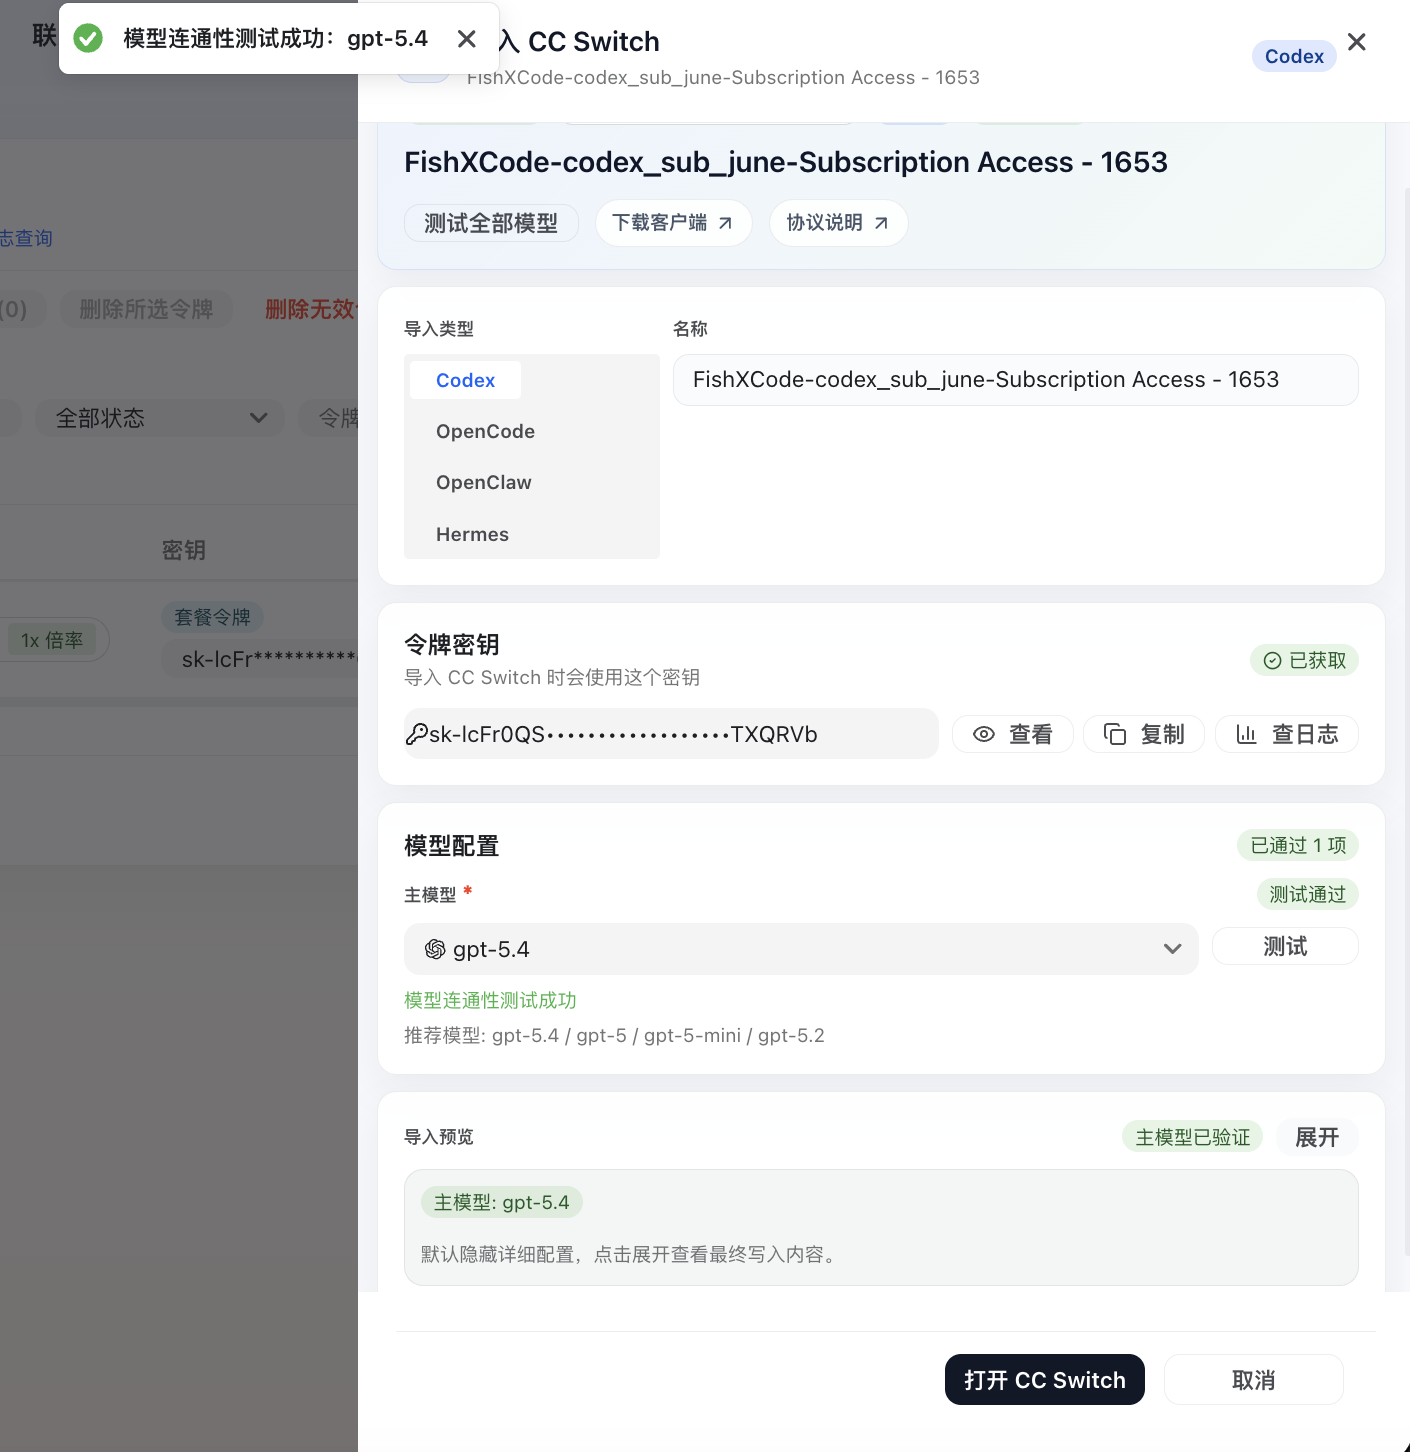
In the CC Switch import dialog, keep these core values:
| Field | FishXCode value |
|---|---|
| API endpoint | https://api.fishxcode.com/v1 |
| API key | FishXCode token |
| Main model | gpt-5.4 or another model available in your plan |
Switch the main model to gpt-5.4, click Test, and import only after you see "Test passed / model connectivity test succeeded":
When the browser opens CC Switch, review the API endpoint, model, and note, then click Import:
After importing, make sure CC Switch is switched to the FishXCode channel, then restart Codex Desktop.
5. Common Controls
Model, reasoning effort, and permissions
Codex Desktop usually shows model, reasoning effort, permission mode, and workspace folder near the input box:

Recommended defaults:
- Model: choose a FishXCode model, such as
gpt-5.4 - Reasoning effort: use medium for daily work, higher only for complex tasks
- Permission mode: use full access for frequent code edits; use manual approval when exploring an unfamiliar project
- Workspace: choose the project folder Codex should inspect or modify
/ and @
Two shortcuts are useful in the input box:
| Symbol | Usage |
|---|---|
/ | Open commands or Skill list |
@ | Reference a file or directory from the current project |
If the menu does not open, make sure there is a space before / or @, and that focus is inside Codex Desktop.
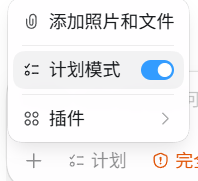
Plan Mode
For complex tasks, start with Plan Mode. Codex will break down the work, ask clarifying questions, and wait for confirmation before editing.
When Codex asks clarifying questions, choose the option that matches your intent:
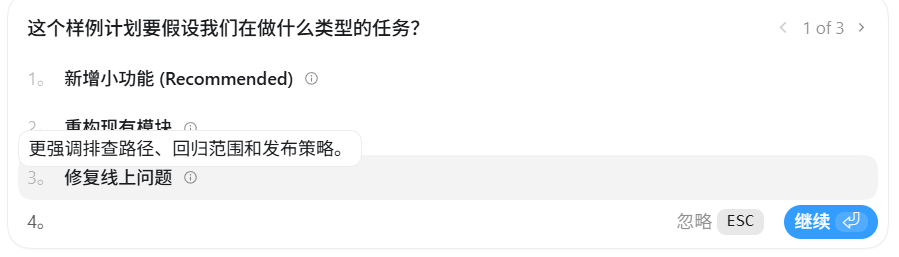
After reviewing the plan, let Codex execute it and monitor the change scope:

6. FAQ
Requests still do not go through FishXCode after sign-in?
Check in order:
~/.codex/config.tomlexistsmodel_providerisfishxcodebase_urlishttps://api.fishxcode.com/v1~/.codex/auth.jsoncontains the FishXCode token- Codex Desktop was fully quit and reopened after config changes
Getting 401 or 403?
Check that the token was copied completely, is enabled, has enough balance, and can access the selected model.
The displayed model is not what you expected?
Check model in config.toml, then check the Codex Desktop model selector. If you use CC Switch, also confirm the current channel is FishXCode.
Seeing a CC Switch not configured message?
If you use CC Switch and see a message like this, the current channel is not set correctly:

Fix it in this order:
- Fully quit Codex Desktop, including the tray process
- Open CC Switch and switch to the FishXCode channel
- Reopen Codex Desktop
If you do not use CC Switch, go back to step 2 and check ~/.codex/config.toml and ~/.codex/auth.json.